Last updated: June 2026
Pickleball’s explosive growth has brought millions of new players to courts nationwide, but many beginners struggle with where to focus their practice time. While the sport may look simple from the sidelines, developing proper technique early makes the difference between frustrating losses and confident, competitive play.
The beauty of pickleball lies in its accessibility, yet mastering the fundamentals separates casual players from those who can hold their own against more experienced opponents. Unlike tennis, where power often dominates, pickleball rewards precision, strategy, and smart shot selection—making it the perfect sport for players willing to invest in proper technique.
These 5 pickleball techniques every beginning player should master form the foundation of successful play. Rather than trying to learn every aspect of the game at once, focusing on these core skills will accelerate your improvement and help you develop good habits that last. Each technique builds upon the others, creating a complete game foundation that will serve you well as you progress from new player to intermediate competitor.
With consistent practice and attention to proper form, most beginners can achieve basic competency in these areas within 3-6 months. The key is understanding that pickleball skills develop progressively—master the basics first, then add complexity and power as your control improves.
1. The Serve - Your Only Fully Controlled Shot
The serve stands alone as the only shot in pickleball where you have complete control over timing, placement, and execution. This makes it your most important weapon for starting each point on your terms, yet many beginning pickleball players rush through their service motion without developing proper technique.
Proper Underhand Serving Technique
Unlike tennis, pickleball requires an underhand motion with the paddle making contact below your waist level. Stand with your non-dominant foot slightly forward, holding the ball in your non-paddle hand. The serving motion should be smooth and pendulum-like, with your paddle face making contact with the ball as it drops naturally.
The key to consistent serving lies in developing a repeatable motion. Keep your wrist firm throughout the swing, using your shoulder and arm to generate the necessary power. Many beginners make the mistake of using too much wrist action, leading to inconsistent ball placement and frequent service faults.
Your paddle must make contact with the ball below your waist, and both feet must remain behind the baseline until after contact. These rules might seem restrictive at first, but they actually help beginners develop better control and consistency than an overhead serve would allow.
Drop Serve vs. Volley Serve
Beginning players should master the drop serve before attempting the traditional volley serve. With a drop serve, you simply drop the ball and let it bounce once before striking it with your paddle. This eliminates timing variables and allows you to focus purely on paddle control and placement.
The volley serve requires you to hit the ball out of your hand without letting it bounce, demanding more precise timing and coordination. While many advanced players prefer the volley serve for its speed and placement options, beginners often struggle with consistency until they’ve developed better paddle control through drop serve practice.
Common Serving Mistakes and Approaches
The most frequent serving errors among new players include hitting the ball too high (above waist level), stepping on or over the baseline during the serve, and failing to clear the kitchen on the opposite side. Each of these results in a fault and lost opportunity to start the point aggressively.
To avoid height violations, practice your serving motion slowly, focusing on keeping the paddle contact point well below your waist. For foot faults, develop a consistent pre-serve routine that positions you safely behind the baseline with room to step forward naturally during your swing.
Kitchen clearance issues typically stem from insufficient power or poor angle selection. Practice serving with enough depth to consistently land your shots beyond the opponent’s kitchen line, aiming for the back third of the service box.
Practice Drills for Serve Development
Start with target practice using cones or markers placed in different areas of the service box. Begin by simply focusing on getting the ball in play consistently, then gradually work on placement to specific zones. Advanced beginners can practice serving to their opponent’s backhand side or deep to the baseline.
Consistency drills involve serving 20 balls in a row, counting only successful serves. Once you can achieve 15 out of 20 successful serves consistently, you’re ready to focus more on placement and strategy rather than just getting the ball in play.
2. The Dink Shot - Control the Kitchen Game
The dink shot represents the heart of pickleball strategy, yet many beginners underestimate its importance in favor of more powerful shots. This soft, controlled shot hit from the kitchen line determines the outcome of most rallies and separates good players from great ones.
Definition and Strategic Purpose
A dink shot is a soft, controlled shot hit with minimal pace that arcs over the net and lands in the opponent’s kitchen area. The purpose isn’t to win the point immediately, but to force your opponent into a difficult position where they cannot attack aggressively. Statistically, over 40% of pickleball points feature extended dinking exchanges, making this the most critical shot for competitive success.
The strategic value of dinking lies in its ability to neutralize power players and create opportunities for put-away shots. When executed properly, dinks force opponents to hit upward on the ball, preventing aggressive attacks and often leading to weak returns you can capitalize on.
Proper Technique and Soft Touch
The key to effective dinking lies in using minimal paddle movement and relying on your shoulder for control rather than your wrist. Keep your paddle face slightly open and make contact with the ball in front of your body, using a gentle lifting motion to clear the net.
Your grip should be firm but not tight, allowing for the soft touch necessary to control the ball’s pace. Many beginners make the mistake of using too much wrist action, which creates inconsistent shots and frequent errors. Instead, think of your paddle as an extension of your arm, moving as one unit through the shot.
The follow-through should be minimal and controlled, with your paddle finishing low and in the direction of your target. Practice hitting dinks with just enough pace to clear the net by 6-12 inches, landing softly in your opponent’s kitchen area.
Kitchen Line Positioning and Footwork
Effective dinking requires proper positioning at the kitchen line, which means standing approximately 12-18 inches behind the non-volley zone line. This distance allows you to move forward for short dinks and back for deeper shots without violating kitchen rules.
Your stance should be slightly wider than shoulder-width with knees bent and weight on the balls of your feet. This athletic position enables quick lateral movement and helps maintain balance during extended dinking rallies. Keep your paddle up and ready, positioned at about chest height for optimal reaction time.
Footwork during dinking exchanges focuses on small, controlled steps rather than large movements. Stay light on your feet and be prepared to move laterally along the kitchen line to maintain good court position throughout the rally.
"Beginners who focus on the dink before anything else jump a full skill level ahead of players who just try to hit hard. The game opens up once you can keep the ball low and force your opponent to lift it."
— Topher, FORWRD co-founder, 4.0-rated player
Cross-Court vs. Straight Dinks
Cross-court dinks offer several advantages over straight dinks, particularly for beginners. The diagonal angle provides more net clearance and a larger target area, reducing the likelihood of hitting the net or going wide. Cross-court dinks also force your opponent to move more, potentially creating better opportunities for aggressive shots.
Straight dinks work best when you want to keep the ball away from the stronger player in doubles or when you’ve pulled your opponent wide and want to hit behind them. However, straight dinks require more precision and offer less margin for error, making them more challenging for beginning players to execute consistently.
Practice Exercises for Dink Development
Start with stationary dinking practice, standing at the kitchen line and working on consistent ball contact and trajectory. Focus on hitting 20 consecutive dinks that land in the kitchen area before progressing to movement drills.
Progressive dinking exercises include alternating cross-court and straight dinks, moving side to side along the kitchen line while maintaining rally consistency, and practicing dinks from different positions (slightly back from the line, closer to the line, etc.). These drills develop the control and adaptability necessary for match play.
3. Groundstrokes - Forehand and Backhand Fundamentals
Solid groundstrokes form the foundation of consistent pickleball play, allowing you to handle balls that bounce before reaching you and set up offensive opportunities. While pickleball groundstrokes share similarities with tennis, the sport’s unique characteristics require specific adaptations for optimal performance.
Continental Grip and Paddle Positioning
The continental grip offers the most versatility for pickleball shots, allowing smooth transitions between forehand, backhand, and volley shots without changing your grip. Hold the paddle as if you’re shaking hands with it, with your thumb and index finger forming a “V” that points toward the top edge of the paddle.
This grip might feel awkward initially if you come from a tennis background, but it provides better control for the soft shots that dominate pickleball. The continental grip also enables easier generation of spin, which becomes increasingly important as your game develops.
Paddle positioning should be slightly in front of your body, with the paddle face perpendicular to the ground during ready position. This neutral position allows for quick adjustments to either forehand or backhand shots without telegraphing your intentions to opponents.
Forehand Groundstroke Mechanics
The forehand groundstroke begins with proper court positioning and early preparation. As soon as you recognize the ball is coming to your forehand side, turn your shoulders and begin your backswing. Keep the backswing compact—pickleball’s faster pace doesn’t allow for the long backswings common in tennis.
Your stance should be sideways to the net with your weight shifting from your back foot to your front foot during the swing. Make contact with the ball at about waist height, with your paddle face square to your target at impact. The follow-through should be smooth and controlled, finishing across your body at about shoulder height.
Power in pickleball groundstrokes comes from proper timing and weight transfer rather than arm strength. Focus on making solid contact with the center of your paddle face, allowing the ball’s momentum and your controlled swing to generate the necessary pace.
Backhand Technique Development
The backhand often becomes a beginner’s weakest shot, making it a frequent target for experienced opponents. Developing a reliable backhand early in your pickleball journey prevents this vulnerability and opens up more strategic options.
For the two-handed backhand, your non-dominant hand should control the paddle while your dominant hand provides support and stability. This technique offers more power and control for beginners, though it can limit reach on wide shots.
The one-handed backhand requires more practice but provides greater reach and versatility. Keep your elbow close to your body during the backswing, and focus on a smooth, controlled swing path. Make contact with the ball slightly in front of your body, with your weight moving forward through the shot.
Many beginners struggle with backhand slice technique, yet this shot proves invaluable for control and placement. To execute a proper slice, open your paddle face slightly and brush down and across the back of the ball, creating backspin that keeps the ball low and forces difficult returns.
Two-Bounce Rule Considerations
The two-bounce rule requires that both the serve and return of serve must bounce before either team can hit the ball in the air. This rule significantly impacts groundstroke strategy, as you must be prepared to hit balls after they bounce throughout the early stages of each point.
Understanding this rule helps you position yourself properly for groundstroke opportunities. After serving, move toward the net but be prepared to let the return bounce before advancing to the kitchen line. Similarly, after returning serve, you must allow the third shot to bounce before moving forward aggressively.
Common Groundstroke Errors and Corrections
The most frequent groundstroke mistakes include overhitting (trying to generate too much power), poor footwork, and inadequate preparation time. Overhitting typically results from tennis habits, where power often dominates. In pickleball, control and placement matter more than raw speed.
Footwork errors usually involve being caught off-balance or failing to move your feet to get in proper position. Practice moving your feet to the ball rather than reaching with your arm, and always try to hit the ball with your body in a balanced, athletic position.
Preparation issues stem from late recognition of where the ball is going. Work on reading your opponent’s paddle face and shot direction early, beginning your preparation as soon as you determine which side the ball is coming to.
4. The Volley - Dominating Net Play
Volley technique separates confident net players from those who struggle in close-quarters exchanges. While the non-volley zone rules add complexity to pickleball volleys, mastering this shot type enables aggressive play and puts constant pressure on your opponents.
Understanding Kitchen Rules and Boundaries
The kitchen (non-volley zone) extends seven feet from the net on both sides of the court, and you cannot hit the ball in the air while standing in this area or touching any kitchen line. This rule fundamentally changes volley strategy compared to tennis, requiring precise footwork and positioning.
You can enter the kitchen after the ball bounces, but you must exit completely before hitting another volley. If your momentum carries you into the kitchen after hitting a volley from outside the zone, it’s a fault even if the shot was successful. Understanding these rules prevents costly errors during competitive play.
The kitchen line itself is considered part of the kitchen, so stepping on the line while volleying results in a fault. Practice maintaining your balance and controlling your momentum to avoid these violations, which become more challenging during fast-paced exchanges.
Proper Volley Technique
Effective volleys require compact paddle movement and quick reactions rather than large swings. Keep your paddle up and in front of your body, ready to react to balls hit directly at you or to either side. Your grip should be firm but not tight, allowing for quick adjustments based on ball speed and spin.
The volley motion is more of a block or punch than a swing, with minimal backswing and a short, controlled follow-through. Make contact with the ball in front of your body, using the ball’s pace and your paddle’s firmness to redirect it toward your target.
For defensive volleys, focus on getting the ball back over the net with good height and depth. Offensive volleys require more precision and power, aimed at opponents’ feet or open court areas where they cannot easily counterattack.
Quick Reaction Training
Volley success depends largely on reaction time and anticipation. Practice drills that improve your ability to react quickly to balls hit directly at you, starting with slower-paced feeds and gradually increasing speed as your reactions improve.
Hand-eye coordination exercises, such as juggling or reaction ball drills, translate directly to improved volley performance. The faster you can process visual information and react with appropriate paddle movement, the more effective your net play becomes.
Anticipation skills develop through experience and observation. Watch your opponent’s paddle face and body position to predict shot direction and speed. This early recognition gives you important extra time to prepare for your volley response.
Kitchen Line Positioning and Momentum Control
Optimal positioning for volleys places you approximately 12-18 inches behind the kitchen line, close enough to reach most shots but with room to step forward when necessary. This positioning also provides space to absorb your forward momentum without entering the kitchen illegally.
Momentum control becomes critical during fast exchanges. Practice stopping your forward movement after hitting volleys, using a wide stance and bent knees to maintain balance. Advanced players learn to hit volleys while moving backward, maintaining legal positioning throughout extended rallies.
Side-to-side movement along the kitchen line allows you to cover more court area and maintain good angles for your volleys. Practice shuffling laterally while keeping your paddle up and ready, maintaining balance and court position throughout the movement.
Offensive vs. Defensive Volleys
Recognize the difference between offensive and defensive volley opportunities. Offensive volleys occur when your opponent hits the ball above net height or with insufficient pace, allowing you to hit downward and aggressively toward their feet or open court.
Defensive volleys happen when you’re forced to hit up on the ball or when your opponent has hit with significant pace. Focus on getting these balls back high and deep, resetting the point to a neutral position rather than trying to win it immediately.
The transition between offensive and defensive volleys often happens multiple times within a single rally. Stay patient and wait for the right opportunity to attack, rather than forcing low-percentage shots that result in errors.
5. The Third Shot Drop - Transitioning to the Net
The third shot drop represents pickleball’s most strategic and technically demanding shot for beginners. This technique allows the serving team to neutralize their positional disadvantage and begin competing for the kitchen line, where most points are ultimately decided.
Strategic Importance in Pickleball Rallies
After the serve and return, the serving team finds themselves at the baseline while their opponents move toward the kitchen line. Without an effective third shot, the serving team remains in a defensive position throughout the rally, severely limiting their chances of winning the point.
The third shot drop solves this positional problem by forcing the opponents to hit up on the ball, preventing aggressive attacks and buying time for the serving team to advance to the net. Statistics show that teams with consistent third shot drops win significantly more points than those who rely primarily on driving or attacking shots.
This shot’s strategic value extends beyond immediate positioning benefits. A well-executed drop shot often forces weak returns that create offensive opportunities, while poor third shots typically result in quick point losses to aggressive opponents positioned at the kitchen line.
Proper Drop Shot Technique
The drop shot requires a significantly different technique than power shots, emphasizing touch and arc over pace and penetration. Your paddle face should be slightly open at contact, with a gentle lifting motion that creates the necessary trajectory to clear the net and land softly.
The swing path moves from low to high, much like an underhand serve motion but with even more control and finesse. Make contact with the ball at about knee height when possible, using a smooth acceleration through impact rather than trying to muscle the ball over the net.
Follow-through should be minimal and controlled, with your paddle finishing at about waist height. The entire motion should feel smooth and rhythmic, avoiding any jerky or rushed movements that typically result in inconsistent ball placement.
Arc and Soft Landing Principles
A proper third shot drop follows a high, arcing trajectory that peaks well above the net before descending into the opponent’s kitchen area. This high arc serves multiple purposes: it provides net clearance, allows time for your advancement to the net, and creates a steep descent angle that’s difficult to attack.
The ball should land with minimal pace, ideally bouncing low and soft enough that opponents cannot hit aggressively downward. Think of the shot as trying to land the ball on a pillow—any excessive pace will cause it to bounce too high and create an easy put-away opportunity for your opponents.
Practice hitting drop shots that bounce twice within the kitchen area when hit with proper technique. This double-bounce test helps ensure you’re using appropriate pace and spin to neutralize offensive opportunities.
Targeting the Kitchen Area
Aim your third shot drops to land in the middle of your opponent’s kitchen, avoiding the temptation to get too fancy with placement early in your development. Consistent depth into the kitchen matters more than precise corner placement, which becomes relevant only after you’ve mastered basic execution.
As your drop shot improves, you can begin targeting specific areas within the kitchen based on your opponent’s positioning and weaknesses. However, beginners should focus on consistency and proper arc before adding placement complexity.
Cross-court drops often provide more margin for error due to the longer distance and better angle, while straight drops can be effective when you want to avoid your opponent’s stronger side or when they’re positioned wide.
Setting Up Net Advancement
The third shot drop’s primary purpose is enabling your advancement to the kitchen line, but this movement must be timed properly to avoid creating vulnerabilities. Begin moving forward as soon as you make contact with the drop shot, but be prepared to stop and hit another shot if your drop isn’t effective.
Most third shots don’t land perfectly, requiring a fourth shot (usually another drop) before you can safely reach the kitchen line. Be patient with this progression rather than rushing forward and getting caught in no-man’s land between the baseline and kitchen.
Communication with your partner in doubles becomes important during this transition. Both players should move forward together, maintaining proper court spacing while advancing toward their optimal net positions.
Progressive Practice Drills
Start third shot drop practice from a stationary position at the baseline, focusing purely on technique and consistency before adding movement or pressure. Use targets in the kitchen area and aim for 7 out of 10 successful drops before progressing to more dynamic drills.
Movement drills combine the drop shot with forward advancement, practicing the timing and footwork necessary for successful net transitions. Start slowly and gradually increase the pace as your coordination improves between shot execution and court movement.
Live ball drills with a practice partner simulate actual match conditions, allowing you to experience the pressure and timing challenges that occur during real points. These drills help integrate the third shot drop into your overall game strategy
Complete Your Pickleball Setup
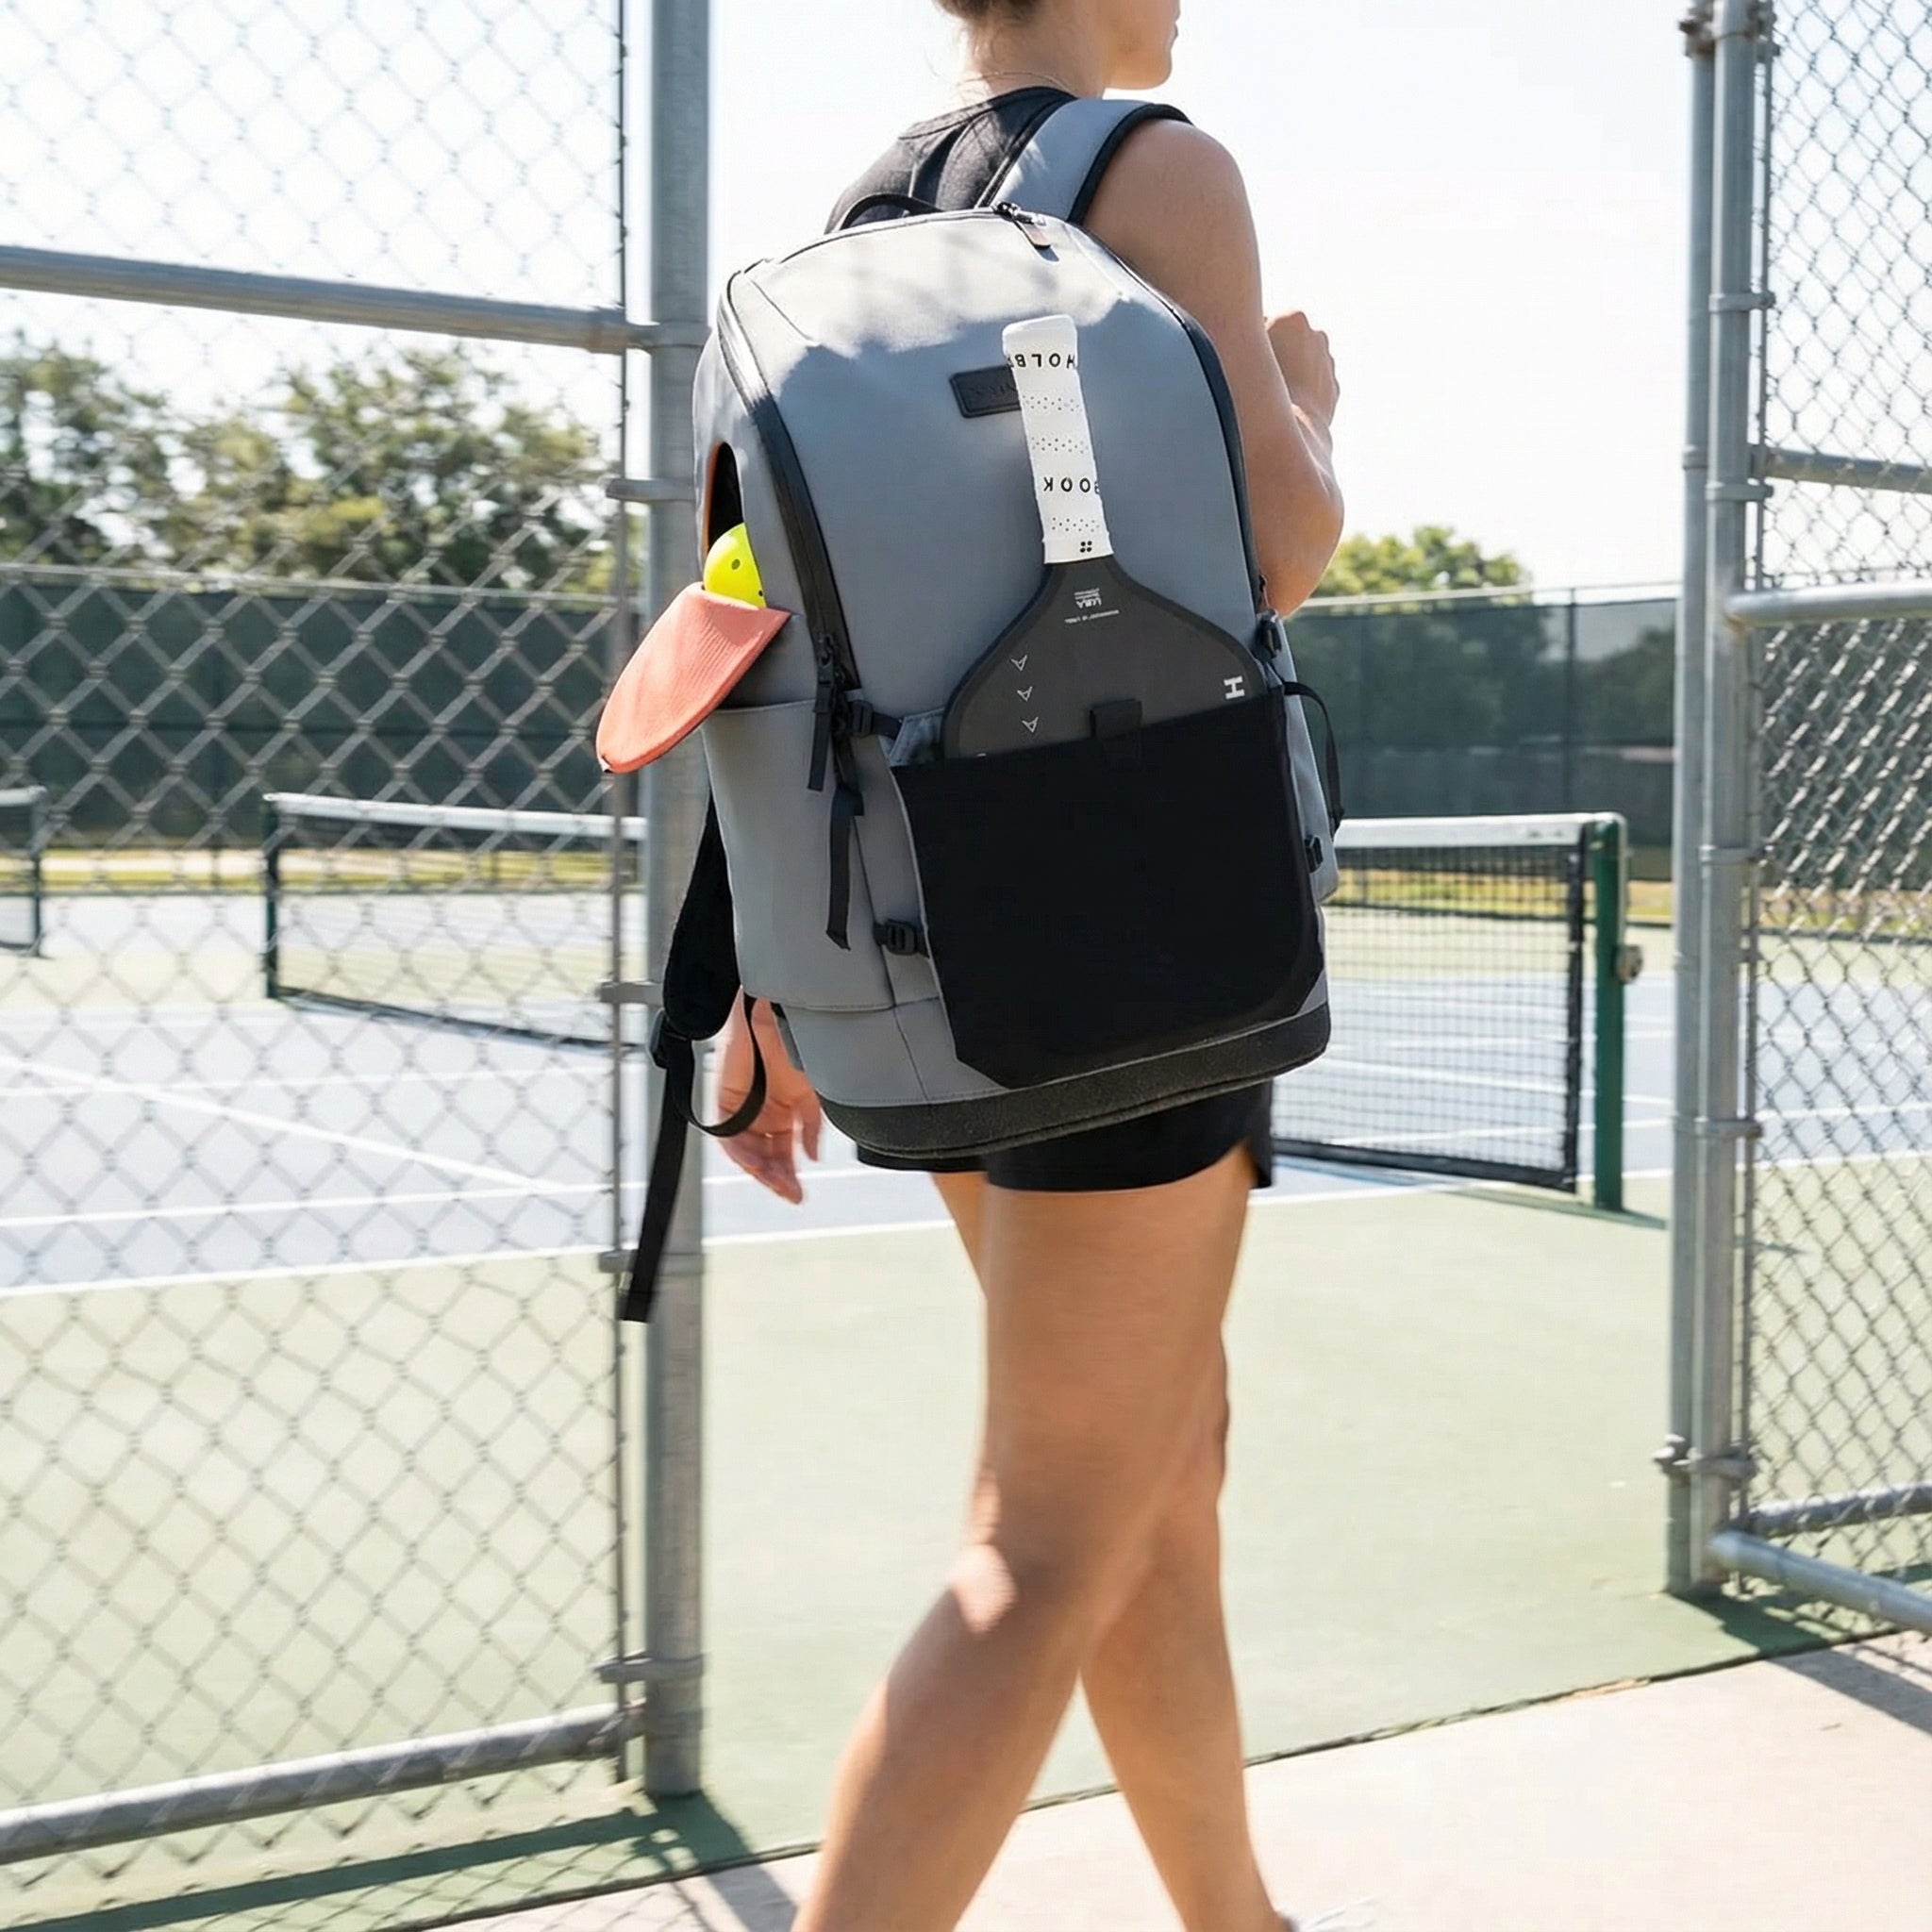
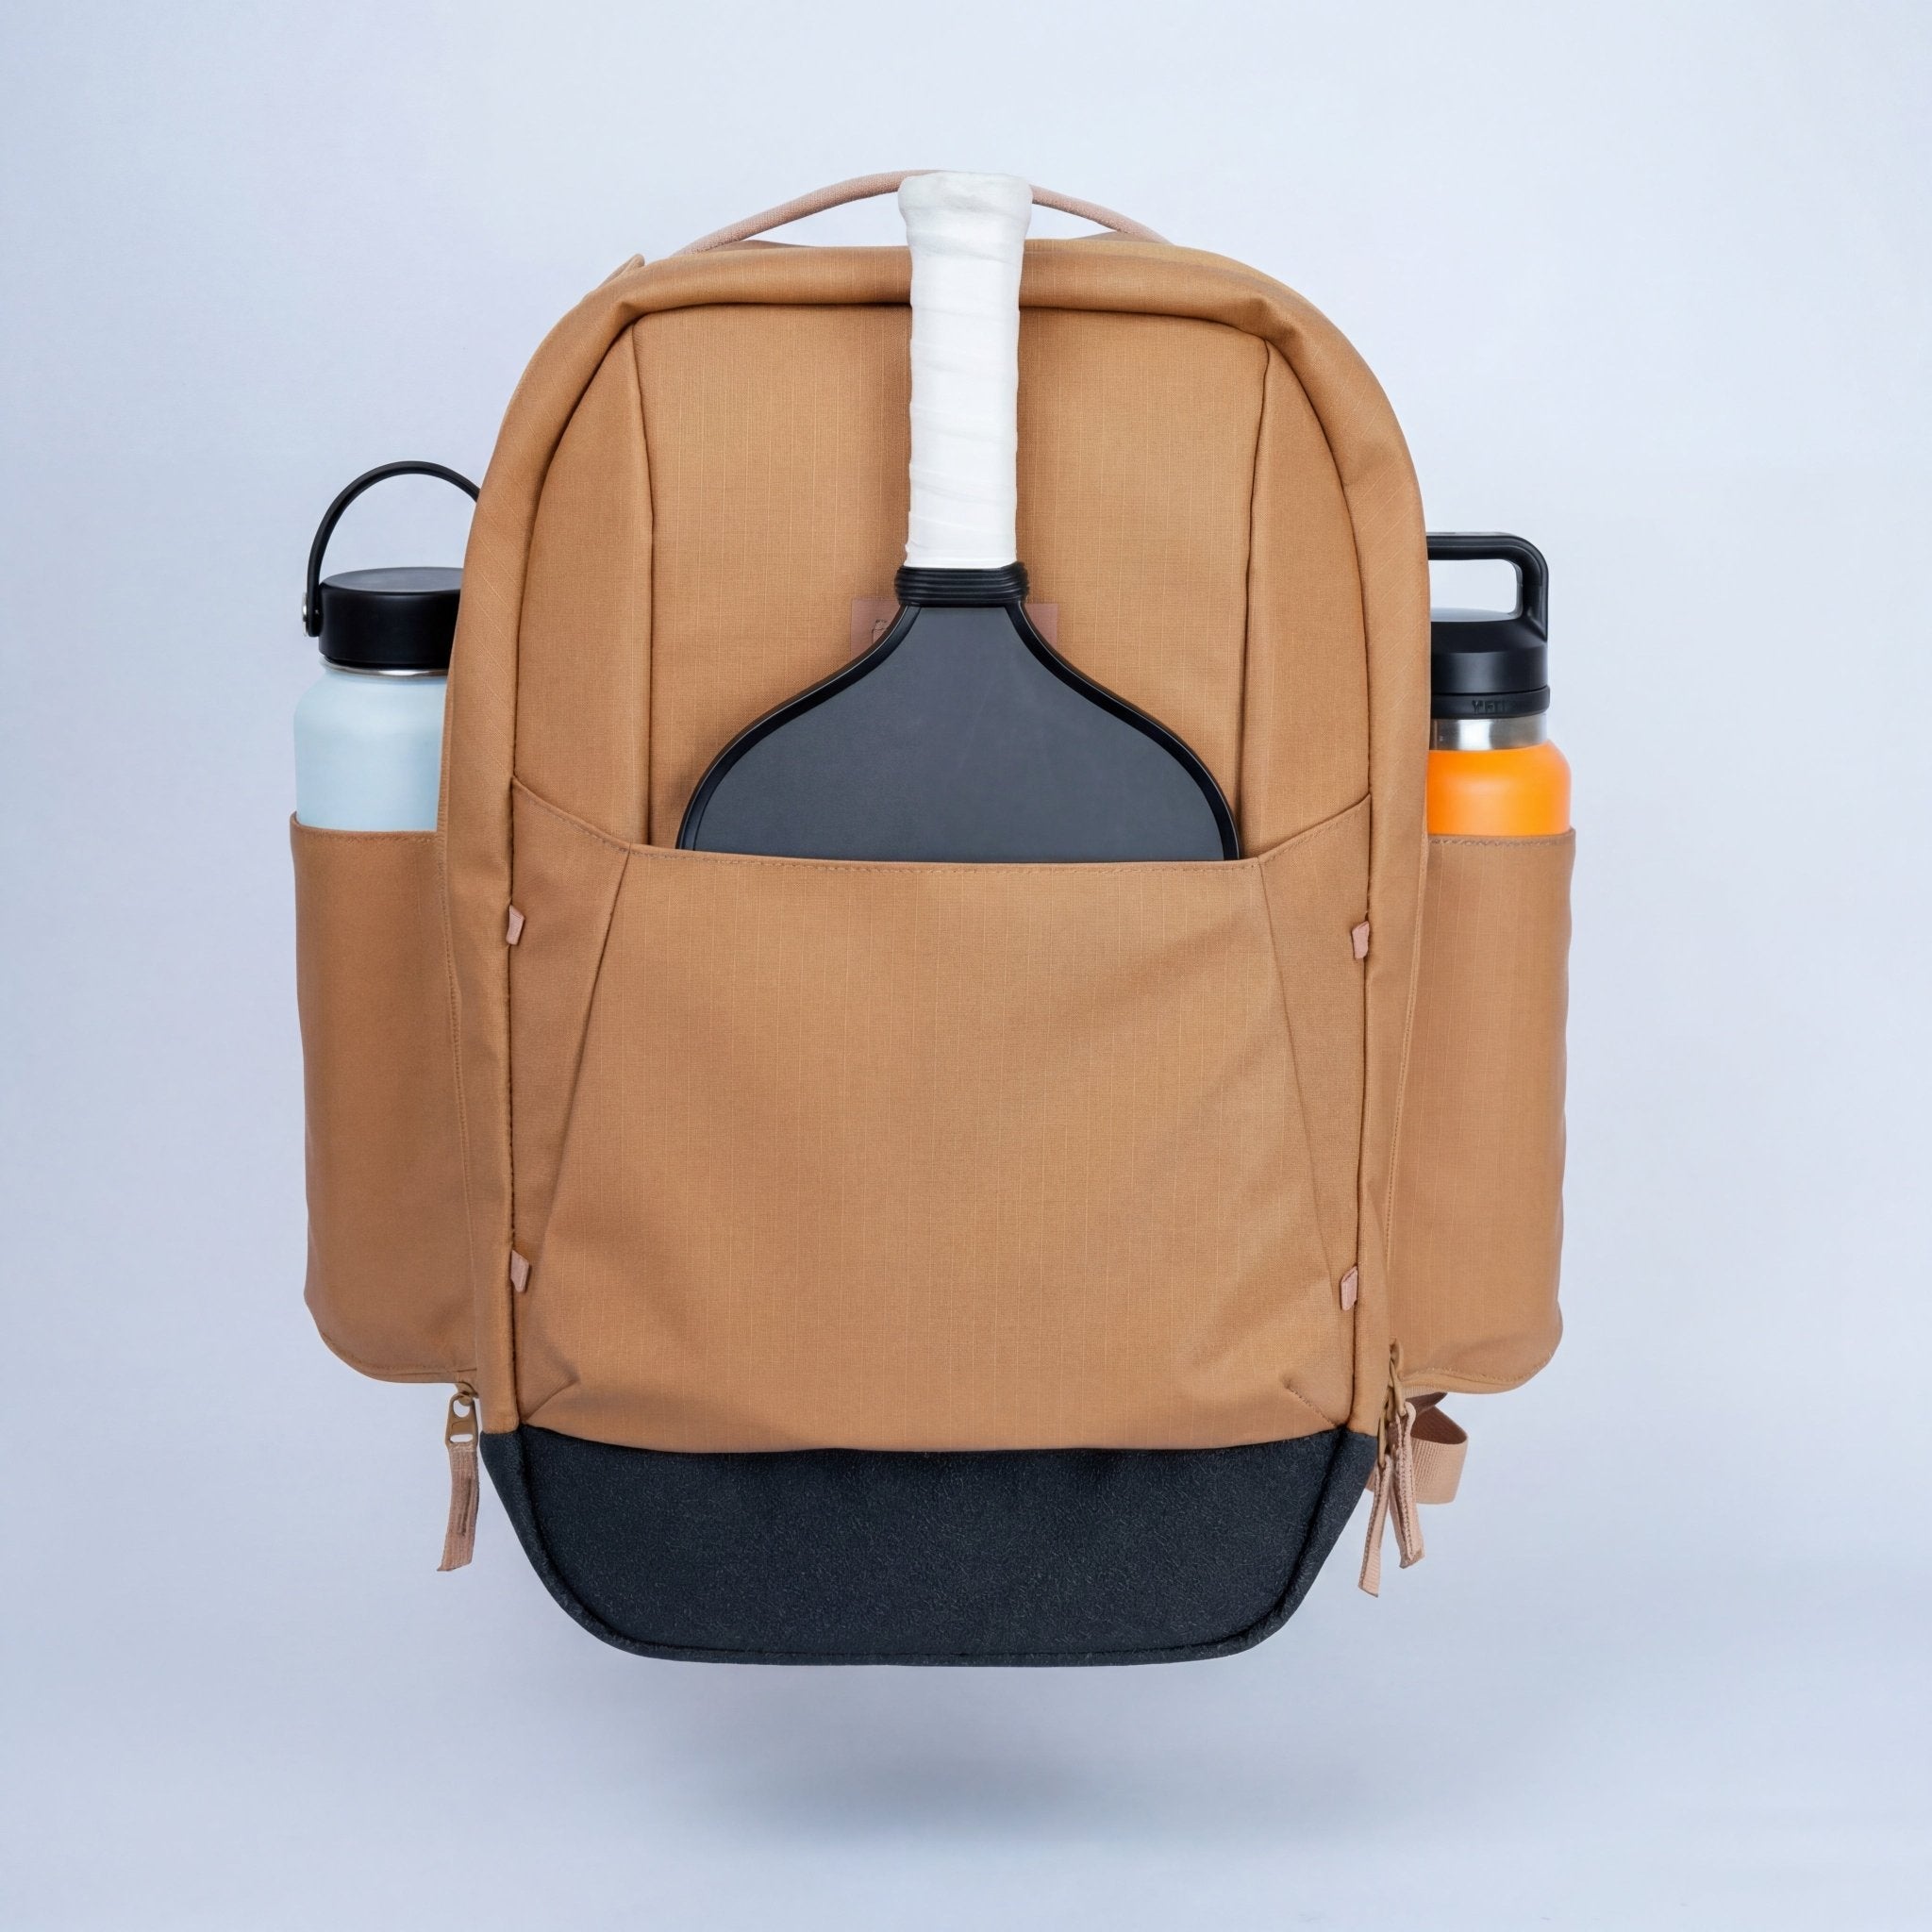
Technique matters. So does showing up with everything organized and ready to go. When you're playing 3+ times per week — which most dedicated beginners hit within a month — you need a bag that keeps your paddles, balls, water, and change of clothes organized without digging around before a 7am session.
The Court Ranger V2 ($195) was designed for exactly this. Dedicated paddle sleeve, 16" padded laptop sleeve, YKK AquaGuard zippers built for outdoor courts, and a main compartment big enough for a full session kit. Built with input from 500+ real players — including plenty of beginners who outgrew their first bag faster than they expected.

Our Pick: FORWRD Court Ranger V2
Organized paddle sleeve, 16" laptop sleeve, built for players who show up more than twice a week.
Putting It All Together - Practice Progression
Mastering these 5 pickleball techniques requires a systematic approach that builds skills progressively while avoiding the common mistake of trying to perfect everything simultaneously. Successful skill development depends on focused practice, realistic goal setting, and understanding how these techniques work together during actual games.
Recommended Practice Sequence
Begin your practice sessions with serving, since it’s the only shot you can practice alone and requires no partner coordination. Spend 10-15 minutes working on serve consistency and placement before moving to other techniques. This warm-up also helps establish the rhythm and touch necessary for more complex shots.
Follow serving practice with groundstroke development, focusing on forehand and backhand consistency from the baseline. These shots provide the foundation for all other techniques and help develop the paddle control essential for advanced play. Practice both cross-court and down-the-line shots to build versatility.
Progress to dinking practice once your groundstrokes feel comfortable. The soft touch required for effective dinking builds naturally from controlled groundstroke practice but requires more precision and finesse. Start with stationary dinking and progress to movement-based drills.
Volley practice should come after you’ve developed good paddle control through groundstrokes and dinking. The quick reactions and compact movements required for effective volleys become easier once you’ve mastered more basic paddle skills.
End each practice session with third shot drop work, as this technique combines elements from all the previous shots while adding strategic complexity. The timing and touch required for drop shots benefit from having warmed up with other techniques first.
Combining Techniques in Game Situations
Understanding how these techniques connect during actual points is important for translating practice success into match performance. A typical point might begin with a serve, continue with groundstroke exchanges, transition through third shot drops, and finish with volley or dinking exchanges at the kitchen line.
Practice mini-games that emphasize specific technique combinations. For example, play points that require three dinks before anyone can hit aggressively, or practice scenarios where every third shot must be a drop. These structured games help integrate techniques while maintaining the competitive element that makes practice engaging.
Recognize that technique selection depends on court position, ball height, and tactical situation. High balls near the kitchen line call for aggressive volleys, while low balls at the baseline require defensive groundstrokes or drop shots. Developing this decision-making ability separates good technique from effective game play.
Setting Measurable Goals
Establish specific, measurable goals for each technique rather than vague improvement objectives. For serving, aim for 8 out of 10 successful serves to specific target areas. For dinking, work toward maintaining 20-ball rallies with a practice partner without errors.
Groundstroke goals might include hitting 15 consecutive forehands and backhands cross-court from the baseline, while volley objectives could focus on successfully completing rapid-fire volley exchanges at the kitchen line for 30 seconds without errors.
Third shot drop goals should emphasize consistency over perfection initially. Aim for 6 out of 10 drops that land in the kitchen area with appropriate arc, gradually increasing the success rate as your technique improves.
Track your progress weekly and adjust goals based on improvement rate. Most beginners can achieve basic competency in each area within 3-6 months of focused practice, but individual progress varies based on practice frequency, previous racquet sport experience, and natural coordination.
Common Integration Mistakes
The most frequent error when learning multiple techniques involves trying to use advanced shots too early in points. Beginners often attempt third shot drops when they should hit groundstrokes, or try aggressive volleys when defensive play is appropriate.
Rushing between techniques during practice also limits skill development. Spend adequate time on each technique individually before combining them in game-like situations. This sequential approach builds stronger foundations than constantly switching between different skills.
Overemphasizing power over control represents another common mistake. Pickleball rewards precision and placement more than raw power, yet many beginners continue trying to hit winners rather than building points through smart shot selection and consistent execution.
Timeline Expectations for Skill Development
Most beginning pickleball players can develop basic serving consistency within 2-4 weeks of regular practice. Groundstroke competency typically takes 4-8 weeks, depending on previous racquet sport experience and practice frequency.
Dinking skills often require 6-12 weeks to develop adequately, as the soft touch and control needed for effective kitchen play challenges most beginners significantly. Don’t get discouraged if dinking progress seems slower than other techniques.
Volley development parallels dinking timeline but may progress faster for players with tennis or ping-pong backgrounds. The quick reactions required become more natural with practice, though kitchen rule compliance adds complexity specific to pickleball.
Third shot drop mastery typically takes the longest, often requiring 3-6 months of focused practice before achieving match-ready consistency. This technique combines elements from all other shots while adding strategic complexity that challenges even experienced players.
Remember that these timelines represent basic competency rather than mastery. Continuing improvement in each area happens throughout your pickleball journey, with advanced players constantly refining technique and adding new dimensions to their game.
The investment in proper technique pays dividends throughout your pickleball career. Players who master these fundamentals early find themselves competing successfully against more experienced opponents and enjoying the game’s strategic depth rather than struggling with basic execution.
Focus on one technique at a time, practice consistently, and be patient with the learning process. These 5 pickleball techniques every beginning player should master will transform your game from frustrating to fun, setting the foundation for years of enjoyable and competitive play.
Frequently Asked Questions: Pickleball Techniques for Beginners
What are the most important pickleball techniques for beginners?
Focus on five: a consistent underhand serve, the dink shot at the kitchen line, solid baseline groundstrokes, controlled volleys, and the third shot drop. Get these five working before you add power or spin to your game. Players who build this foundation early compete much better at 6 months than those who just wing it from the start.
How long does it take to get good at pickleball?
Serving and groundstroke basics come within 4–8 weeks of regular play. Dinking takes 6–12 weeks because the touch is counterintuitive — your instinct is to swing harder. The third shot drop is the hardest and typically takes 3–6 months to hit reliably. Previous racquet sports experience (tennis, ping-pong) speeds everything up noticeably.
What is the hardest pickleball shot to learn?
The third shot drop. It requires a specific soft-touch arc from the baseline while your opponent has positional advantage at the net. There's no power to bail you out — it's pure touch and consistency under pressure. Most beginners need 3–6 months of dedicated drilling before it becomes match-reliable.
Should beginners take pickleball lessons?
Yes — one or two early lessons pay off for years. An instructor catches technique habits before they're drilled in. Bad grip, wrong body position, inconsistent serving motion — these feel comfortable and hard to fix after 500 reps. Many rec centers offer beginner clinics for $20–$40. Worth it before the wrong habits get automatic.
What's the difference between a dink and a third shot drop?
A dink is hit from at or near the kitchen line — it's the shot you use during extended kitchen rallies to keep the ball low and force errors. The third shot drop is the same soft arc, but hit from your baseline when the point starts. You're using a drop to transition safely from the baseline to the kitchen line, not to extend a rally.
Leave a comment
This site is protected by hCaptcha and the hCaptcha Privacy Policy and Terms of Service apply.